
mini-planet
multimedia
photography
photomanipulation
photoshop
planet photography
polar panoramic
stereographic
tutorial
Planet Photography Tutorial
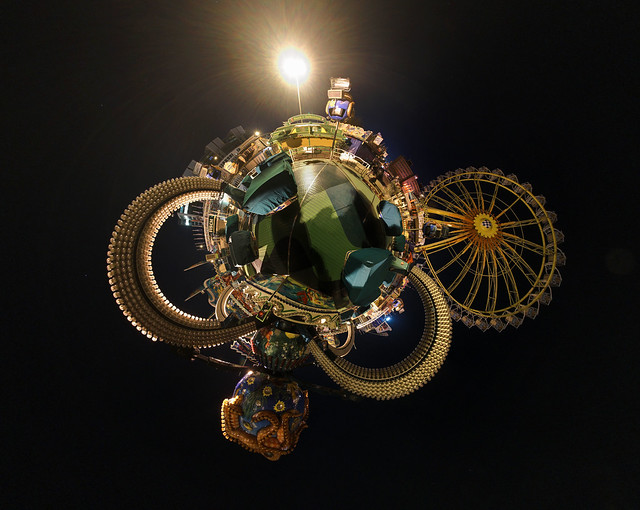
It is another trend in panoramic photography. Planet photography is also known as Polar Panoramic Photography, Mini-Planet and Stereographic Planet. It uses panoramic shots, digital manipulated, to make a photo of planet. I find it very amusing to see what we can do with photos these days. I'm really into it so i tried to make some with the use of panoramic shots i found in the internet. For educational purposes, i grabbed some photos and tried which works best for this technique. Here's one of my favorites and i decided to make a 3-step tutorial out of it.
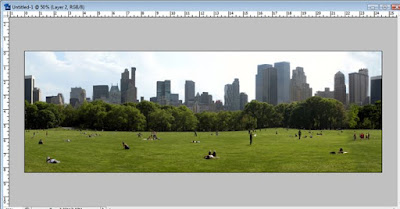
First, you have to take a nice panoramic shot of your subject. This works best for 360° panoramas like this photo by 360vrs.com. You can see the photo here. Disclaimer! I don't own the photo so don't use it for commercial purposes. :D Download the image and open the image in Adobe Photoshop. Or, you can copy the image below (right click > copy image) make a new document (cltr+n > OK) and paste (ctrl+v).

Next, resize the image so that the width is the same as its height. Go to Image > Image Size or press Ctrl+Alt+I. Uncheck "Constraint Proportions" and change the width and height to your desired size. 600 will do for now. It will look like this.

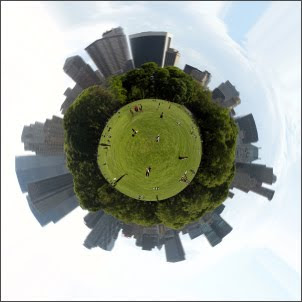
Rotate the image 180 degrees (Image > Rotate > 180°). By now your image will look like this.

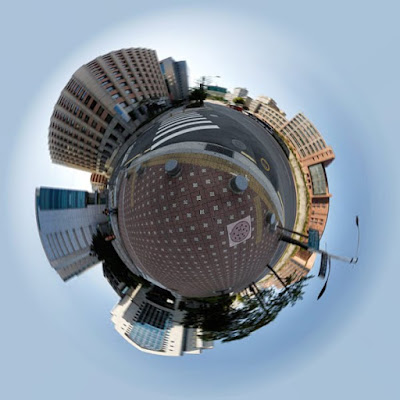
And finally, go to Filter > Distort > Polar Coordinates. Make sure that the "Rectangular to Polar" is selected and click OK. You will have the final output like this.
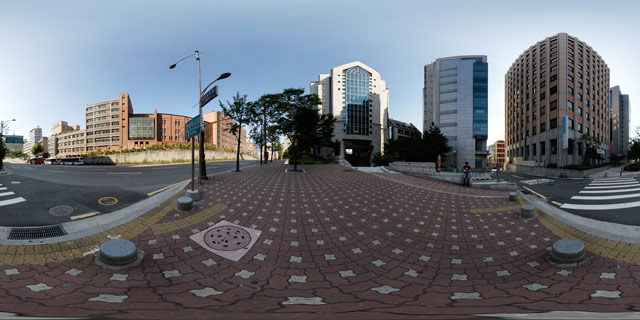
Awesome, right? You can try doing this to other photos by googling "Panorama" or "Panoramic Photos" or you can be more specific. Not all photos are perfect for planet photography, though. You have to consider some these things. Take the image below as an example.
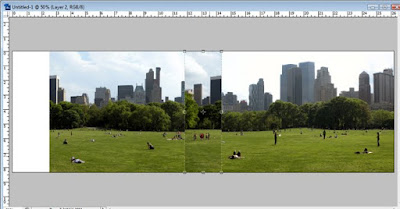
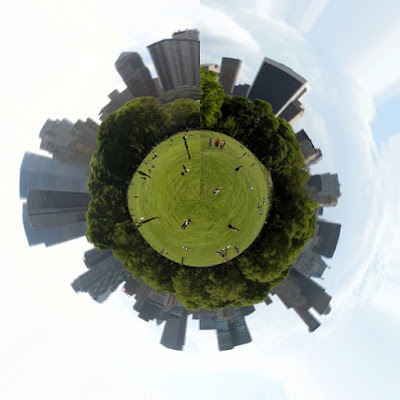 As you can see in the center, the edges were not seamlessly stitched. So to fix this, you can do some improvisation. Below is the original photo of the panoramic shot above. I copied the image and pasted it in photoshop so it will be a separate layer from the background.

First, i used the rectangular marquee tool (M) and selected a portion of the left edge. You can also do it in the other side.

Then, i cut the selection (ctrl+x) and pasted it above the layer (ctrl+v). It will look like this.
Next, i moved the original image to the left so it will touch the edge. Then, i moved the pasted edge to the other side covering the edge of the other layer like so.
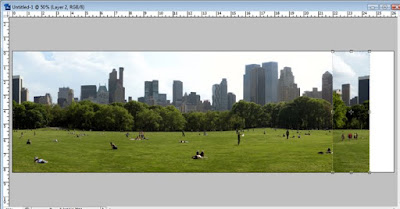
Then i used the eraser tool (soft round 100 pixels) to blend the top layer.

Afterwards, i cropped the white space.
Then, i did the three steps to make the "planet." Here's the output.
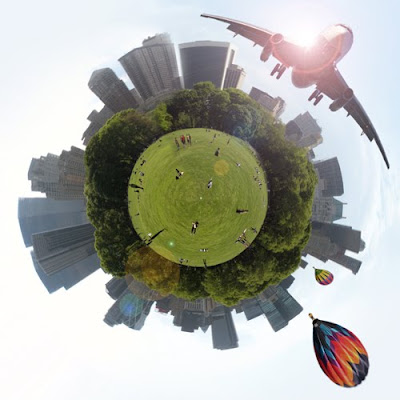
However, the shape is irregular and the clouds are not clean. I used the liquify tool to fix it the shape and brushed the clouds. And finally, i added some air balloons and a plane with lens flare for a dramatic effect. :D Here's the final output.
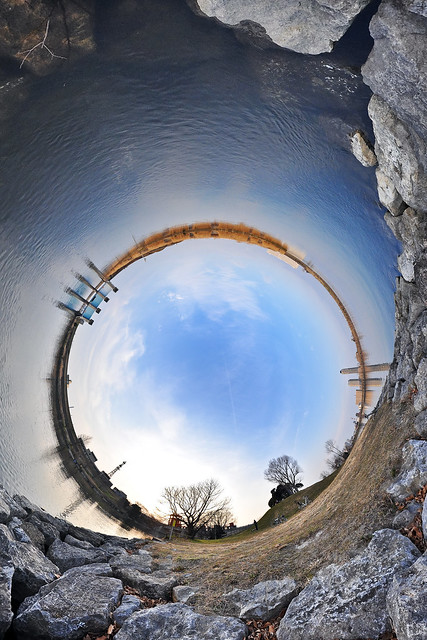
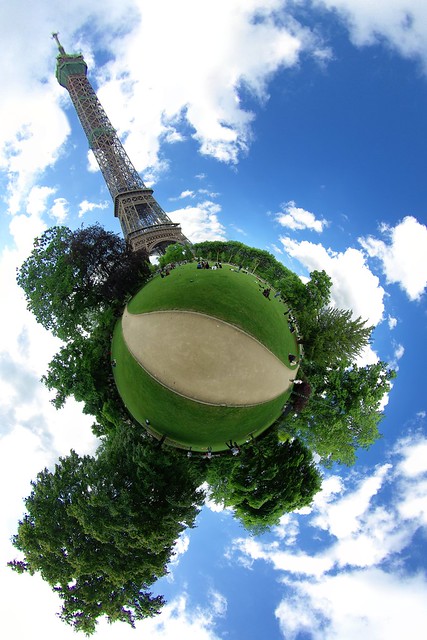
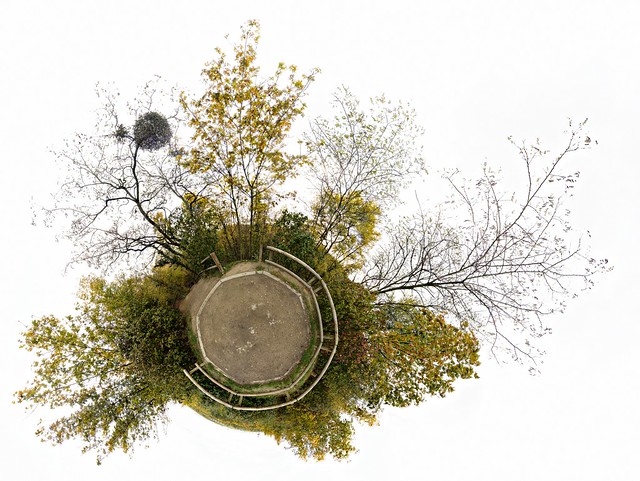
Here are more of my experiments of photos i found in the web.


And here are awesome works i found in the web:
Thanks for reading my post. Here are some links about Planet Photography that you might want to explore:
Stunning Planet Photography by Best Bookmarks
Tiny Planet Photography
360VRs

First, you have to take a nice panoramic shot of your subject. This works best for 360° panoramas like this photo by 360vrs.com. You can see the photo here. Disclaimer! I don't own the photo so don't use it for commercial purposes. :D Download the image and open the image in Adobe Photoshop. Or, you can copy the image below (right click > copy image) make a new document (cltr+n > OK) and paste (ctrl+v).
Next, resize the image so that the width is the same as its height. Go to Image > Image Size or press Ctrl+Alt+I. Uncheck "Constraint Proportions" and change the width and height to your desired size. 600 will do for now. It will look like this.

Rotate the image 180 degrees (Image > Rotate > 180°). By now your image will look like this.

And finally, go to Filter > Distort > Polar Coordinates. Make sure that the "Rectangular to Polar" is selected and click OK. You will have the final output like this.
Awesome, right? You can try doing this to other photos by googling "Panorama" or "Panoramic Photos" or you can be more specific. Not all photos are perfect for planet photography, though. You have to consider some these things. Take the image below as an example.
 As you can see in the center, the edges were not seamlessly stitched. So to fix this, you can do some improvisation. Below is the original photo of the panoramic shot above. I copied the image and pasted it in photoshop so it will be a separate layer from the background.
First, i used the rectangular marquee tool (M) and selected a portion of the left edge. You can also do it in the other side.

Then, i cut the selection (ctrl+x) and pasted it above the layer (ctrl+v). It will look like this.

Next, i moved the original image to the left so it will touch the edge. Then, i moved the pasted edge to the other side covering the edge of the other layer like so.

Then i used the eraser tool (soft round 100 pixels) to blend the top layer.

Afterwards, i cropped the white space.

Then, i did the three steps to make the "planet." Here's the output.

However, the shape is irregular and the clouds are not clean. I used the liquify tool to fix it the shape and brushed the clouds. And finally, i added some air balloons and a plane with lens flare for a dramatic effect. :D Here's the final output.

Here are more of my experiments of photos i found in the web.


And here are awesome works i found in the web:
Thanks for reading my post. Here are some links about Planet Photography that you might want to explore:


Stunning Planet Photography by Best Bookmarks
Tiny Planet Photography
360VRs


 Cedrick S. Zabala "CSZ97" is a multimedia artist based in the City of Zamboanga. He graduated with a Bachelor's degree in Information Technology major in Multimedia and Computer Animation. Currently he works at the City Government of Zamboanga under the Mayor's Office as a Public Information Officer, and as a part-time Instructor in Ateneo de Zamboanga University. He is currently taking his Master's Degree in Public Administration in Western Mindanao State University. He lives a life with a passion for the arts, culture, and travel. This blog contains his works and travel journals. Carpe effin' Diem!


Post a Comment